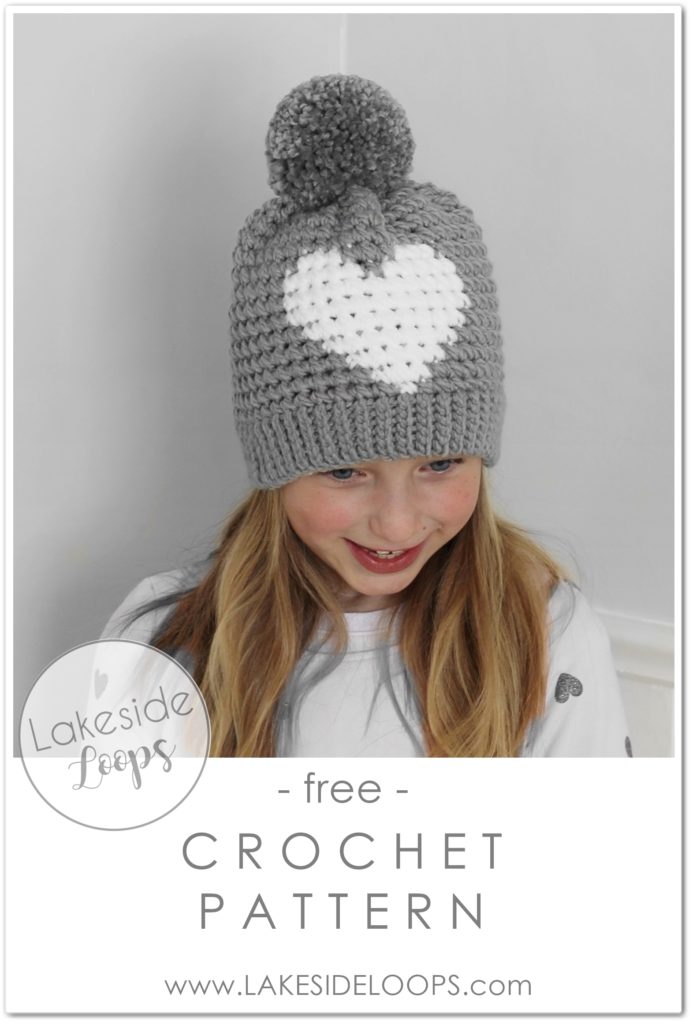

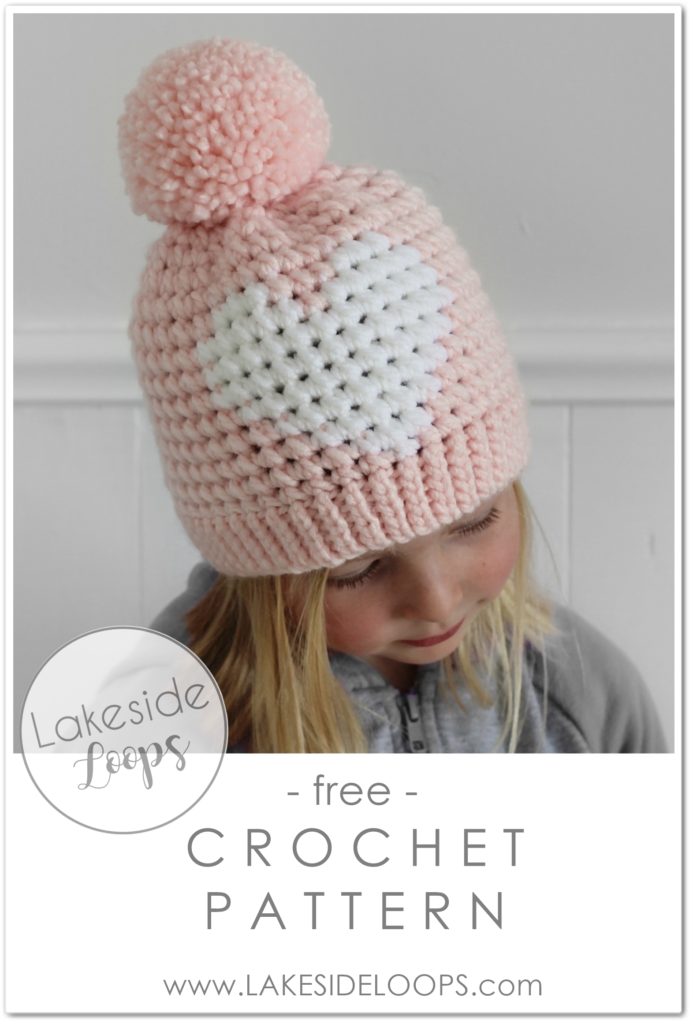
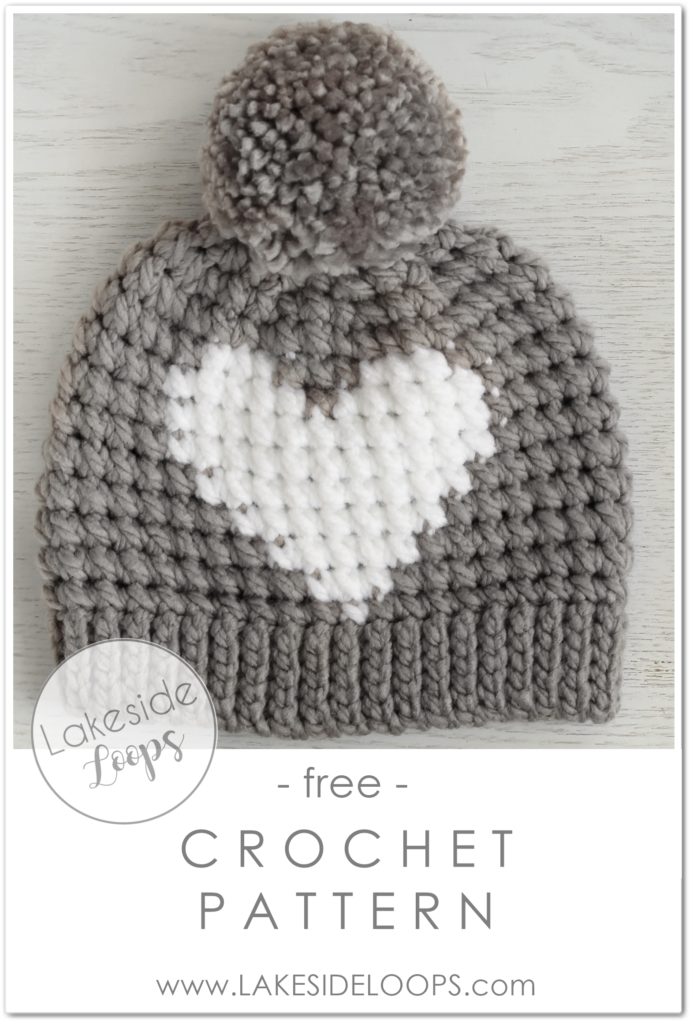
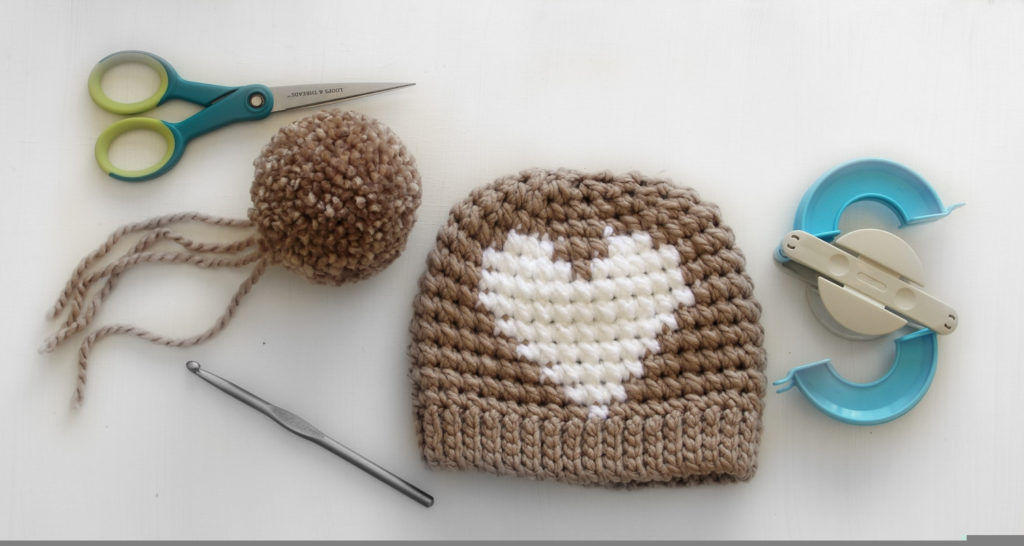
This simple crocheted heart hat is my most requested crochet pattern design! I’m thrilled to finally be sharing it – for FREE! Inspired by my collaboration with Jillian Harris and Etsy this toque is warm but not too thick, works up quickly, and looks like knit (but is actually completely crochet)! So grab some bulky yarn + a 6.5 mm crochet hook and scroll down to make your own. You can also download the pdf pattern HERE if you’d like an easier to read + save version.
It was around this time last year that I was approached by Etsy to work with Jillian Harris (a Canadian TV personality, interior designer, & blogger) on a limited edition collection of Canadian handmade holiday pieces (you can read what Style at Home wrote about it HERE). To say I was thrilled to be included in this project would be an understatement. I had been a long time follower of Jillian Harris on Instagram and enjoyed her show (Love It or List It Vancouver) on HGTV. She’s real, fun, and her classic + feminine style is simply dreamy! Together we designed a crochet heart hat that was snug, sweet, and lightweight. The limited edition toques were sold on Etsy from November through December 2018 and after selling out multiple times I was flooded with requests for the pattern (after all, that’s what I do; I write and share crochet patterns)!
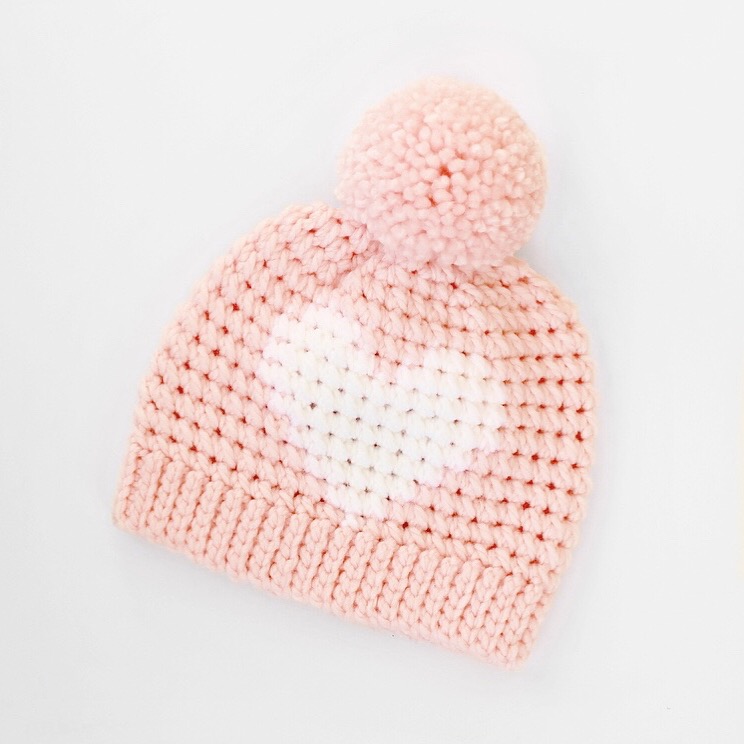
The original hat was created to be a tighter + shorter fit. The heart design was bulkier but still sweet. I was really proud of the finished pieces but that pattern wasn’t mine alone to share . . it was designed in collaboration with Jillian and her team. SO, I designed a NEW heart toque! Version 2.0 if you will. It has a different brim, different fit, uses different stitches, and has a different heart shape . . . and I hope it steals your *heart* all the same! ; )
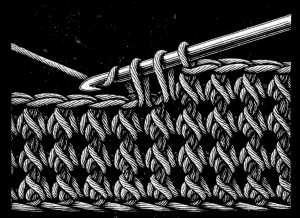
What excites me most about this pattern is the stitch used to create the heart design! I wracked my brain trying to find a way to line up my stitches to create a clean silhouette. In the past I’ve used ‘Front Post Single Crochets’ and ‘Front Post Half Double Crochets’ to stack my stitches when creating shapes in the round (like in my ‘Linen Coffer Cozy‘ pattern or my ‘Brody Storage Bag‘ pattern) but I didn’t want the bulk that comes with front post stitches for this project. I realised that if I could somehow find a stitch that combined the previous stitch with the next stitch it would land directly above the stitches in the round below. Eureka! (ha). A sc2tog (single crochet two together) worked into the previous stitch and next stitch was the ticket! No bulk, perfectly lined up stitches, and easy colour changes. Hdc2tog (half double crochet two together) works equally well but was too tall for this project (stay tuned for that stitch in a later design though)!
I knew I couldn’t be the only crocheter who’d used this method so I searched the world wide web for others . . . a name for this method . . . a term for the technique! I came up empty before releasing my ‘Henley Cable Heart Hat‘ pattern which uses the same stitch but tried again and finally found a post via Pinterest on the Encyclopedia of Needlework! The DOUBLE STITCH: “Take up a loop right and left of a stitch of the preceding row so that, counting the loop of the last stitch, you have 3 loops on the needle, make and over and draw it through the 3 loops”. Yes!
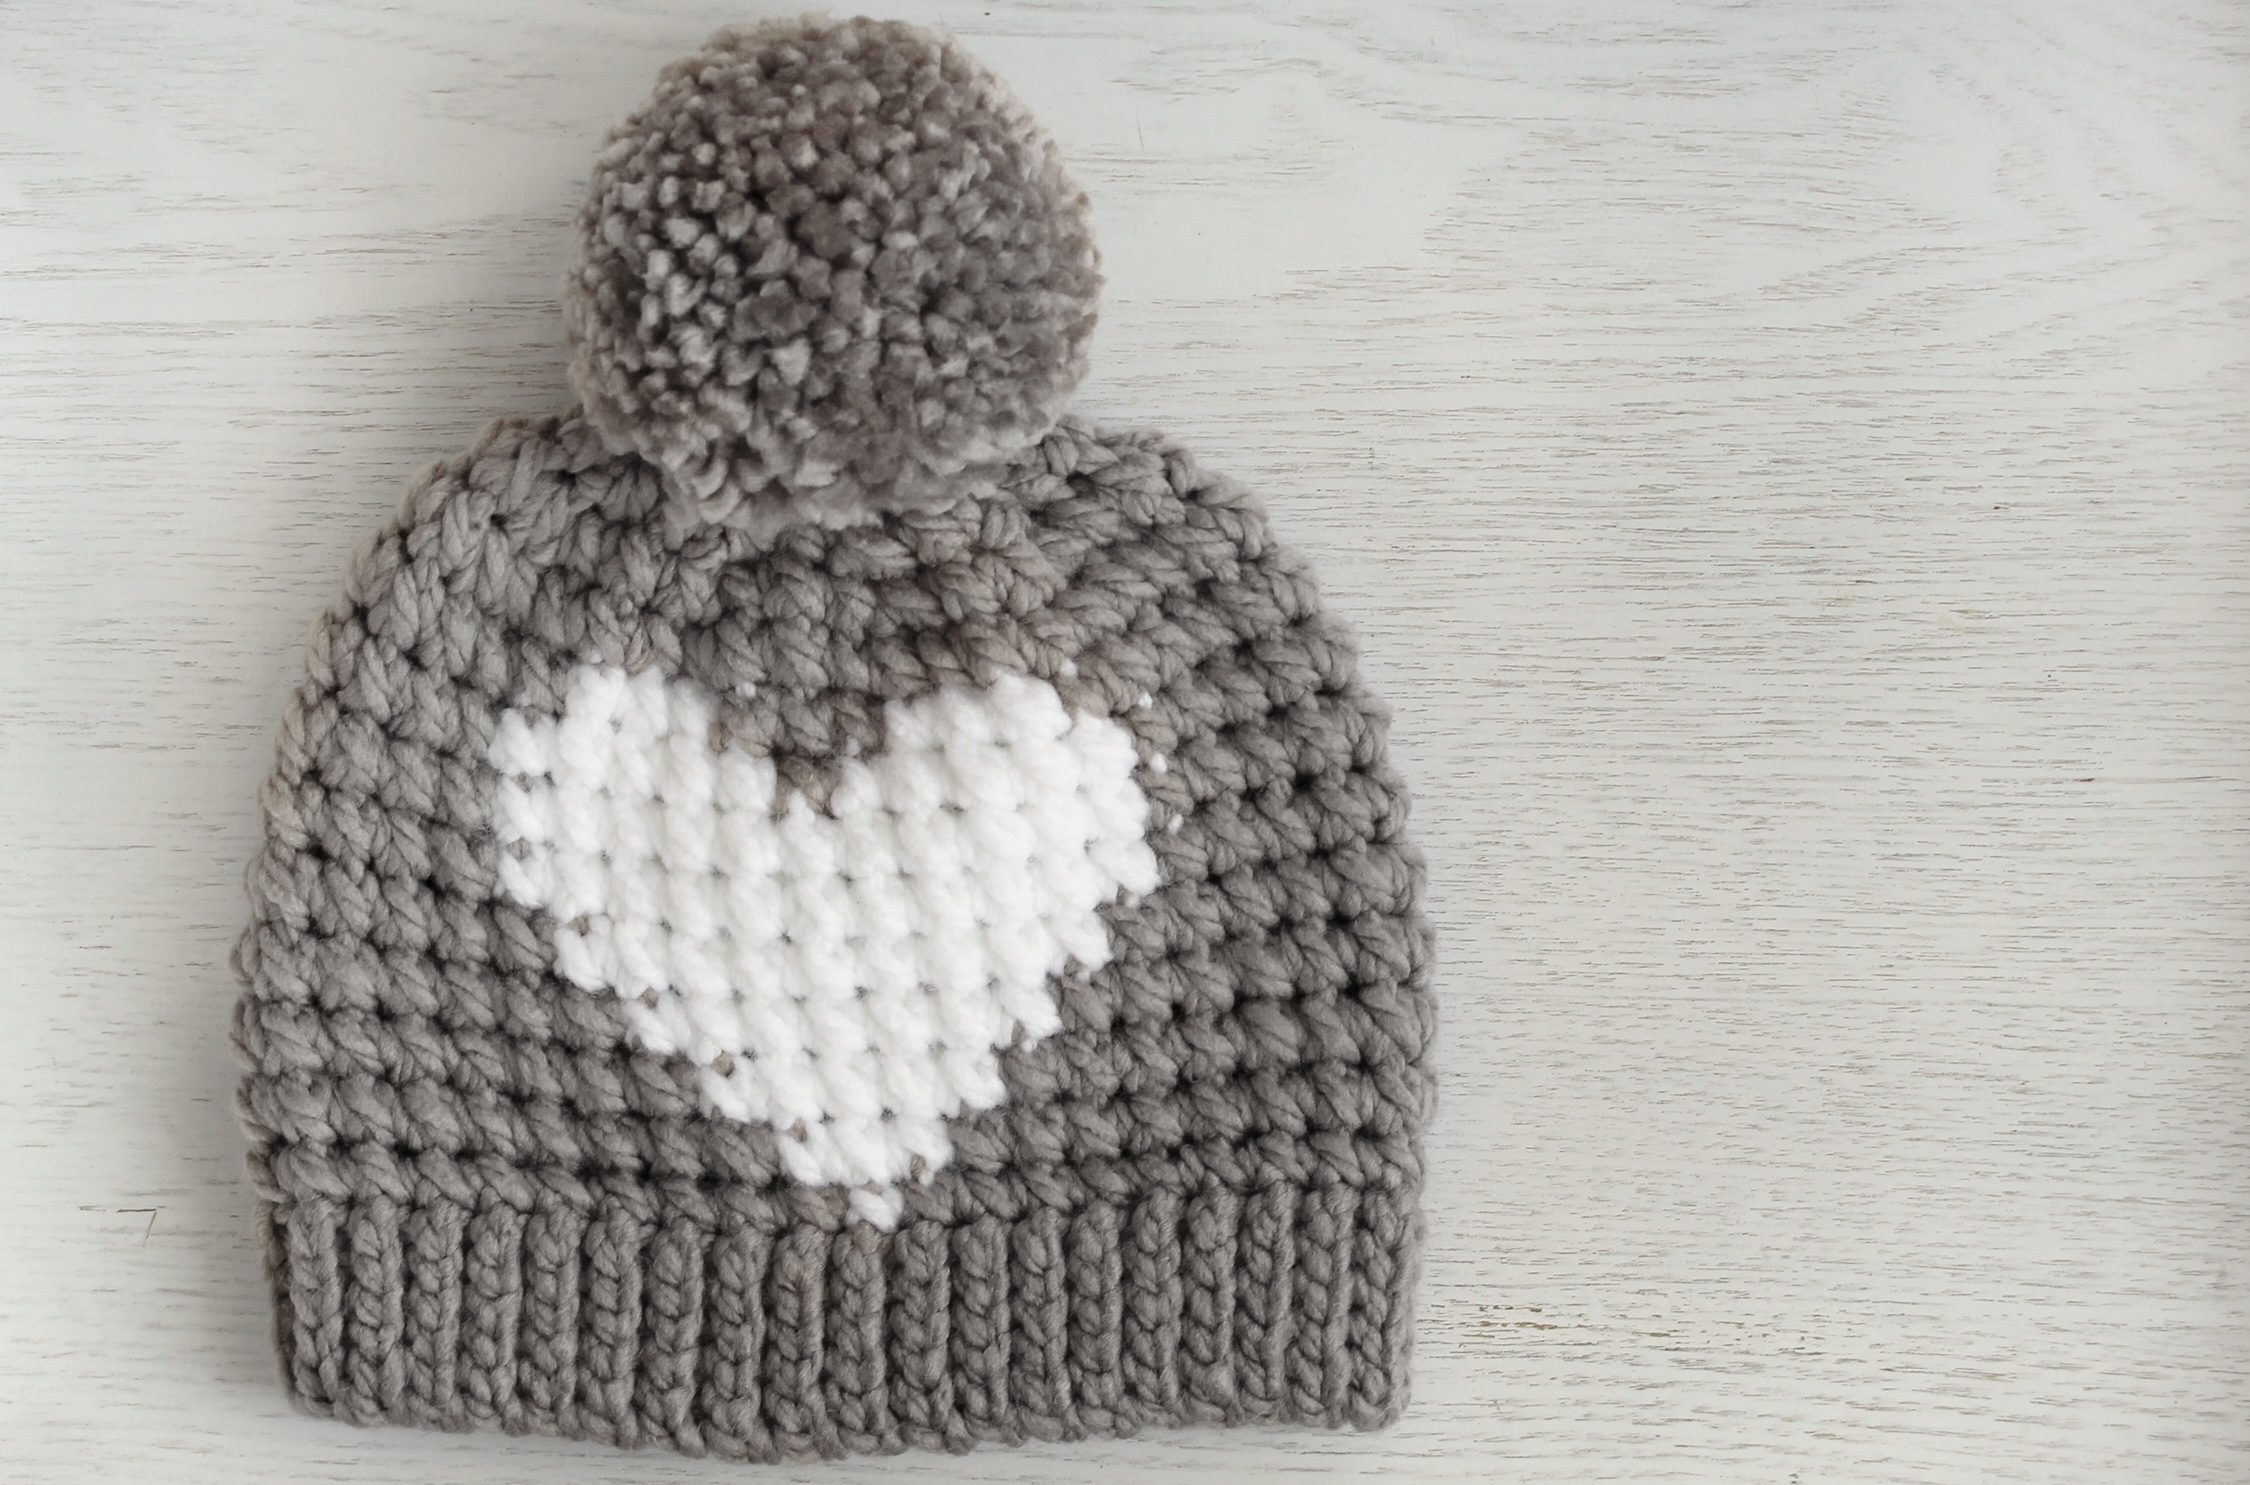
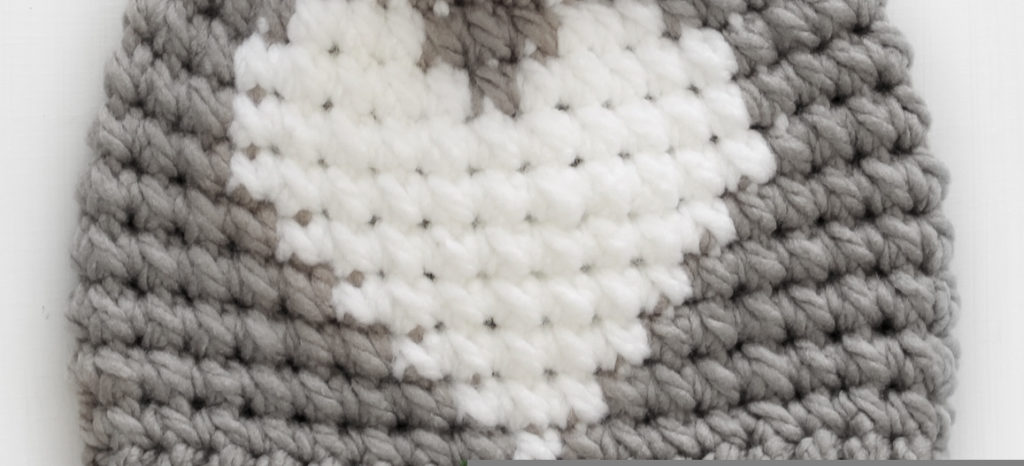
This stitch has so many design possibilities! I not only love the simple look, almost like circles that from afar have a slight waffle look, but to be able to stack crochet stitches vertically in the round means a whole new world of colour change patterns for non-knitters.
Okay, okay, now that I’ve thoroughly bored you with the details on how this design came about and the special stitch that makes my heart skip let’s get to the pattern, eh!
F I N I S H E D S I Z E S
Baby (Age 6-12 Months) – 16” circumference, 6” high
Toddler (Age 1-3 Years) – 18” circumference, 7” high
Child (3-10 Years) – 19” circumference, 7.5” high
Adult – 20” circumference, 8” high
M A T E R I A L S
Hook – US K / 10 ½ – 6.50mm crochet hook
Yarn – Any bulky weight yarn (size 5 / ‘Chunky’ / 12 ply)
◦ Loops & Threads® Charisma™ Sorbet™ (Blossom | Silver | White)
▪ Amounts needed:
➢ Baby (Age 6-12 Months)
◦ Base Colour – approximately 85 yards or 78 meters
◦ Contrasting Colour – approximately 9 yards or 8 meters
➢ Toddler (Age 1-3 Years)
◦ Base Colour – approximately 98 yards or 90 meters
◦ Contrasting Colour – approximately 9 yards or 8 meters
➢ Child (3-10 Years)
◦ Base Colour – approximately 109 yards or 100 meters
◦ Contrasting Colour – approximately 9 yards or 8 meters
➢Adult
◦ Base Colour – approximately 129 yards or 118 meters
◦ Contrasting Colour – approximately 9 yards or 8 meters
Pompom – Any yarn or faux fur pom pom will work
◦ Yardage above includes yarn required for pom pom
G A U G E
9 stitches = 4 inches
9 rounds = 4 inches
P A T T E R N A B B R E V I A T I O N S
English (US) terms
ch – Chain: Yarn over, pull through loop on hook
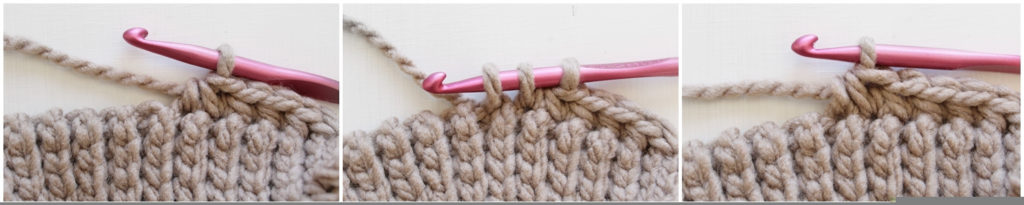
ds – Double Stitch: insert hook to the right of stitch, yarn over and pull through, insert hook to the left of stitch, yarn over and pull through, yarn over and pull through all 3 loops on hook
sl st – Slip Stitch: Insert hook into stitch, yarn over and pull through stitch and loop on hook
sts – Stitches: Number of various stitches made in a row/round
BC – Base Colour: Main colour yarn used for the pattern (body of hat)
CC – Contrasting Colour: Secondary colour yarn used for the pattern (heart)
SWITCHING COLOURS: Use colour needed for next stitch to complete current stitch
N O T E S
- Beginning chain does NOT count as a stitch in stitch counts
- Brim of hat is worked in rows and then joined to form a circle
- Body of hat is worked in rounds from the bottom up
- When creating heart design yarn can be either carried around or dropped and picked up again when needed (make sure to leave enough slack behind silhouette so that hat has give when worn)
- Stitch count in [ ] at the end of each row is in order of size
V I D E O T U T O R I A L
There is a video tutorial available for this pattern on YouTube:
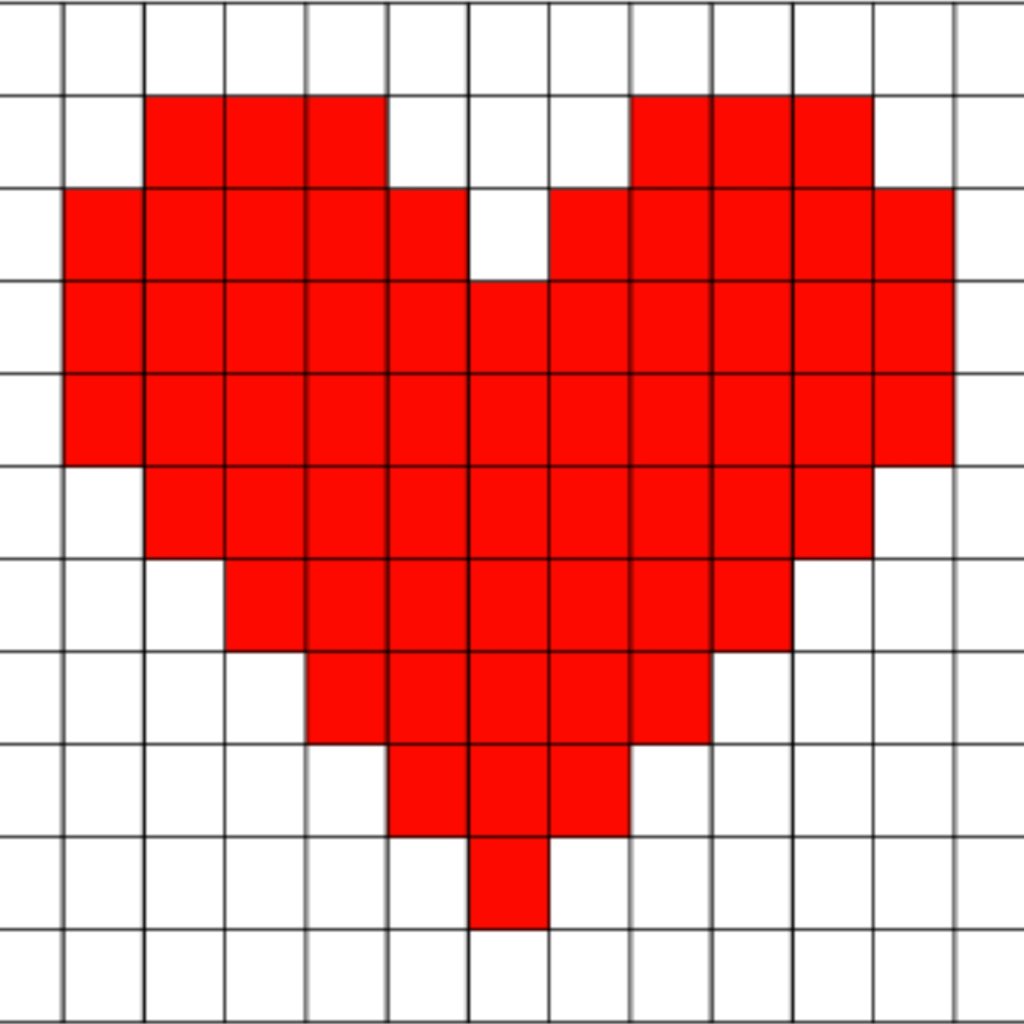
C H A R T
W R I T T E N P A T T E R N
English (US) terms
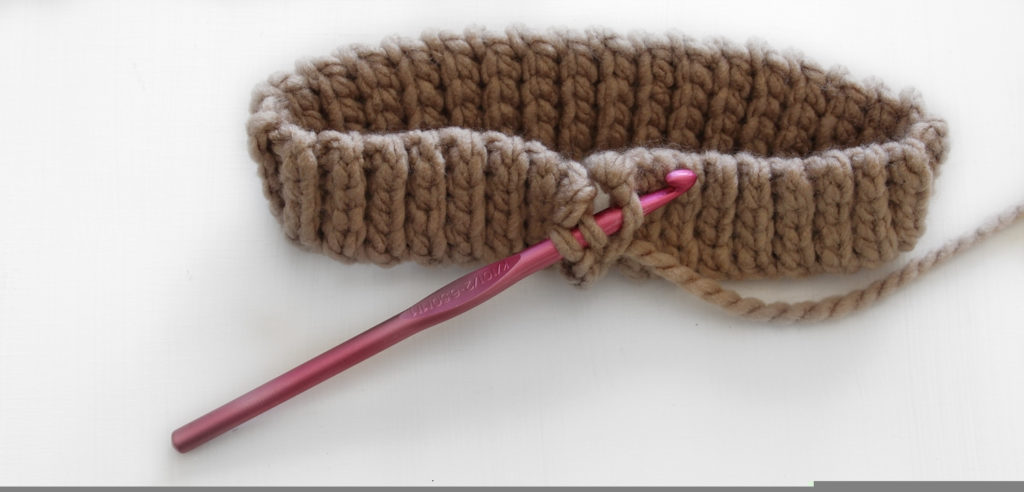
BRIM OF HAT
Work in rows to complete the brim of hat
ROW 1
Using Base Colour (BC) yarn
Chain:
- 5 – Baby (Age 6-12 Months)
- 6 – Toddler (Age 1-3 Years)
- 6 – Child (3-10 Years)
- 7 – Adult
Sl st in 2nd ch from hook, sl st down chain
[4 sl st | 5 sl st | 5 sl st | 6 sl st]
ROW 2
Turn, ch 1, sl st in back loop in each stitch down row
[4 sl st | 5 sl st | 5 sl st | 6 sl st]
ROW 3 & UP
Repeat Row 2 until:
- Row 70 (35 ribs) – Baby (Age 6-12 Months)
- Row 78 (39 ribs) – Toddler (Age 1-3 Years)
- Row 82 (41 ribs) – Child (3-10 Years)
- Row 88 (44 ribs) – Adult
Ch 1, sl st last row and first row together to form a circle
[4 sl st | 5 sl st | 5 sl st | 6 sl st]
BODY OF HAT
Work in rounds to complete the body of the hat
ROUND 1
(Work to the right and left of each rib around brim creating one ds per rib)
BC ds, place stitch marker,
ds next:
- 18 ribs – Baby (Age 6-12 Months)
- 20 ribs – Toddler (Age 1-3 Years)
- 21 ribs – Child (3-10 Years)
- 22 ribs – Adult
CC ds next rib,
BC ds remaining ribs in round,
do not join
(your last ds should be worked over seam and into first stitch of round 1)
– place stitch marker
Rounds will be worked in a continuous circle – no joins/seam
[36 ds | 40 ds | 42 ds | 45 ds]
ROUND 2
BC ds next:
- 17 stitches – Baby (Age 6-12 Months)
- 19 stitches – Toddler (Age 1-3 Years)
- 20 stitches – Child (3-10 Years)
- 21 stitches – Adult
CC [ds next stitch] x 3,
BC ds remaining stitches in round,
Place stitch marker in last stitch
[36 ds | 40 ds | 42 ds | 45 ds]
ROUND 3
BC ds next:
- 16 stitches – Baby (Age 6-12 Months)
- 18 stitches – Toddler (Age 1-3 Years)
- 19 stitches – Child (3-10 Years)
- 20 stitches – Adult
CC [ds next stitch] x 5,
BC ds remaining stitches in round,
Place stitch marker in last stitch
[36 ds | 40 ds | 42 ds | 45 ds]
ROUND 4
BC ds next:
- 15 stitches – Baby (Age 6-12 Months)
- 17 stitches – Toddler (Age 1-3 Years)
- 18 stitches – Child (3-10 Years)
- 19 stitches – Adult
CC [ds next stitch] x 7,
BC ds remaining stitches in round,
Place stitch marker in last stitch
[36 ds | 40 ds | 42 ds | 45 ds]
ROUND 5
BC ds next:
- 14 stitches – Baby (Age 6-12 Months)
- 16 stitches – Toddler (Age 1-3 Years)
- 17 stitches – Child (3-10 Years)
- 18 stitches – Adult
CC [ds next stitch] x 9,
BC ds remaining stitches in round,
Place stitch marker in last stitch
[36 ds | 40 ds | 42 ds | 45 ds]
ROUND 6
BC ds next:
- 13 stitches – Baby (Age 6-12 Months)
- 15 stitches – Toddler (Age 1-3 Years)
- 16 stitches – Child (3-10 Years)
- 17 stitches – Adult
CC [ds next stitch] x 11,
BC ds remaining stitches in round,
Place stitch marker in last stitch
[36 ds | 40 ds | 42 ds | 45 ds]
ROUND 7
BC ds next:
- 13 stitches – Baby (Age 6-12 Months)
- 15 stitches – Toddler (Age 1-3 Years)
- 16 stitches – Child (3-10 Years)
- 17 stitches – Adult
CC [ds next stitch] x 11,
BC ds remaining stitches in round,
Place stitch marker in last stitch
[36 ds | 40 ds | 42 ds | 45 ds]
ROUND 8
BC ds next:
- 13 stitches – Baby (Age 6-12 Months)
- 15 stitches – Toddler (Age 1-3 Years)
- 16 stitches – Child (3-10 Years)
- 17 stitches – Adult
CC [ds next stitch] x 5,
BC ds next stitch,
CC [ds next stitch] x 5,
BC ds remaining stitches in round,
Place stitch marker in last stitch
[36 ds | 40 ds | 42 ds | 45 ds]
ROUND 9
BC ds next:
- 14 stitches – Baby (Age 6-12 Months)
- 16 stitches – Toddler (Age 1-3 Years)
- 17 stitches – Child (3-10 Years)
- 18 stitches – Adult
CC [ds next stitch] x 3,
BC [ds next stitch] x 3,
CC [ds next stitch] x 3,
BC ds remaining stitches in round,
Place stitch marker in last stitch
[36 ds | 40 ds | 42 ds | 45 ds]
STOP HERE FOR BABY (AGE 6-12 MONTHS) SIZE AND SKIP TO ROUND 13
ROUND 10
BC ds around,
Place stitch marker in last stitch
[40 ds | 42 ds | 45 ds]
STOP HERE FOR TODDLER (AGE 1-3 YEARS) SIZE AND SKIP TO ROUND 13
ROUND 11
BC ds around,
Place stitch marker in last stitch
[42 ds | 45 ds]
STOP HERE FOR CHILD (AGE 3-10 YEARS) SIZE AND SKIP TO ROUND 13
ROUND 12
BC ds around,
Place stitch marker in last stitch
[45 ds]
ROUND 13
BC *[ds next 3 stitches, skip next stitch],
Repeat from * until:
- No stitches remain
- No stitches remain
- 2 stitches remain
- 1 stitch remains
If stitches remain: ds remaining stitches in round,
Place stitch marker in last stitch
[27 ds | 30 ds | 32 ds | 34 ds]
ROUND 14
BC *[ds next 2 stitches, skip next stitch],
Repeat from * until:
- No stitches remain
- No stitches remain
- 2 stitches remain
- 1 stitch remains
If stitches remain: ds remaining stitches in round,
Place stitch marker in last stitch
[18 ds | 20 ds | 22 ds | 23 ds]
ROUND 15
BC *[ds next stitch, skip next stitch],
Repeat from * until:
- No stitches remain
- No stitches remain
- No stitches remain
- 1 stitch remains
If stitch remains: ds last stitch in round
[9 ds | 10 ds | 11 ds | 12 ds]
Finish off
Weave yarn around opening at top of hat and pull to close.
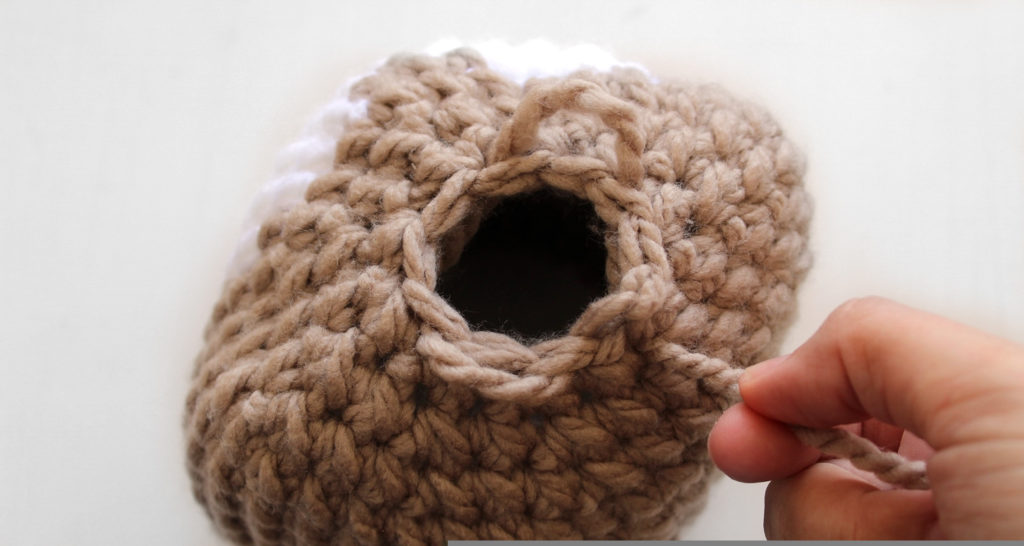
Attach pom pom
Thank you for looping together this lakeside inspired project!